|
Build an Animated
Title with Multiple Images
You can upload up to 4 images that
will be displayed in sequence in the title space area of your
website. This is useful if you want to feature your products or
list an array of services which do not fit into one image. Each
of the images can be linked to a specific page.
To use this feature, you must have
a template or a Page Layout that allows for a title space section.
Each Advanced Page Layout and the pre-made Templates have a title
space section. Only some of the Basic Page Layouts have a title
space section. Those that do are clearly noted (they start with
layout number 9).
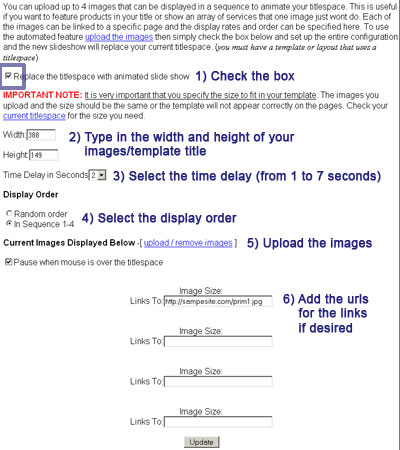
You must first check the
box to enable the animated title slideshow (as shown above).
Second, you must specify
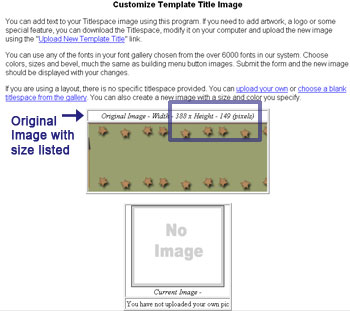
the width and height of your image. These numbers should be the
same as the sizes for your title space. If you're not sure how
large your image should be, look at either the Original Size (if you're using a template) or the
Current Image size if you are using a blank title space. It is very important
that these images are the same size. If they are different, your
animation will likely look strange on your website.
Third, specify the time
delay in seconds in between each image. You can choose anywhere
from 1 second to 7 seconds. In the example above, 2 seconds is
selected.
Fourth, select the display
order of the images. You can either select for the images to
appear in random fashion or in the sequence you uploded. In the
example above, In Sequence is selected.
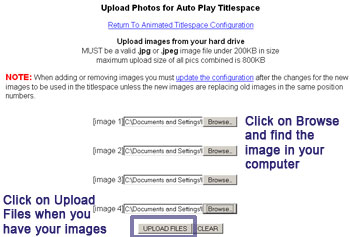
Fifth, click on the Upload/Remove
Images link and upload your images. Here you can also select if
you want the animation to stop if someone puts their mouse over
the title space.
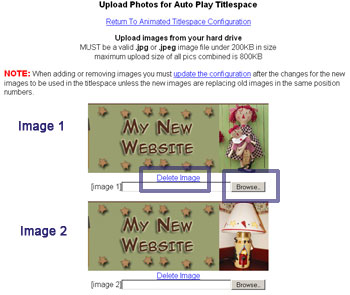
If your upload is successful,
the system will return you to the same page and display your
images along with the Delete Image link right below the image.
You can also click on Browse and reupload images. Note:
If you reuploaded images and you continue to see your old images,
make sure that you refresh your page.
Finally, if you want the
images to be linked, you can add the website urls in the boxes
corresponding to each image. In the example presented above,
there is only a website url listed for the first image. Note that
the url needs to begin with the https://.
When you finish, click on the Upload button
to save your changes.
|