|
Building Custom
Templates
Our system uses
templates to assemble pages in real time. Standard websites are
built one page at a time, while our system builds the pages from
parts as they are viewed. This allows you to build one template
and update the entire website with one click.
To build a template you need
to have an understanding of building web pages using any standard
web page editor. You will need to understand the components of a
page and where those components are located or the paths to the
images and files. If you don't know how to build a static page
you won't understand taking the next step to making that static
page a dynamic teplate.
Each template will be unique
and will have to allow room for the features being used on your
website. If you are using the shopping cart browse, used car
dealer gallery, forums, guestbook or other dynamic features you
will need a main content area of at least 600 pixels otherwise
the area will expand beyound the space you have allowed. The same
is true for any pictures you have in the pages, the template
needs to allow for all the paramaters on all the pages of the
website. If you build pages, you already understand that, but for
those of you buying commercial templates you will need to use a
template that fits your websites spacial needs.
Custom Template Basics
Converting your template for
use on our system is relatively simple. You are only required to
add one element to the page. We use a replacement string
designated by !!MAINCONTENT!! that will be typed
into the template in the exact location you want the main content
to appear. When a page is accessed by a visitor, that string will
be removed from the template and replaced with the actual page
content.
First build the main page
using your favorite page editor just like on any other webite.
Once you have completed the
design, you will need to add in the replacement codes that will
allow the system to add in dynamic elements like buttons,
text and e-commerce functions. The only required string is for
the main content, so in this basic outline we will only show that
single element and leave the other elements for the more advanced
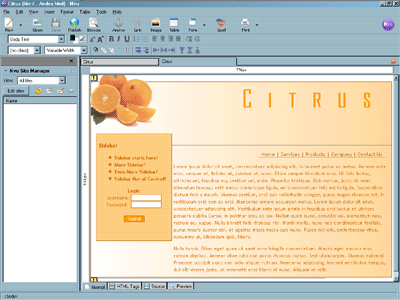
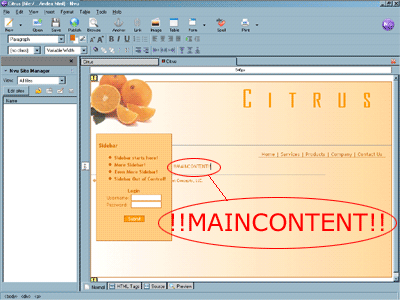
instructions.In the lower right of our example the main content
area is filled with sample text. You will need to remove that and
add in the text !!MAINCONTENT!! as displayed below.
Setting The Image
Paths
Now you will need to update
the image paths in the source code. Most templates are either
built with a relative path like ./images or images that reside in
the same directory as the template. Every desiger knows that that
only works for the design and that websites with multiple
directories require an exact image url or a realative path from
the main directory.
Since we have advanced as well
as inexperienced webmasters, fo the sake of simplicity we will
use the full urls of the images.
All template images will be
loaded into /images/custom/custom-000 so the urls will be https://yourdomain.com/images/custom/custom-000/imagename.jpg
with the domain and image names replaced accordingly.
in our case we use a
background image so our main body tag looks like this:
<body background =
"bg-orange.jpg">
We will change the local image
path to the full url on the website.
<body background =
"https://yourdomain.com/images/custom/custom-000/bg-orange.jpg">
Follow that same format for
all of the images in your template so all image tags will work on
the webiste. Of course you will need to make sure all links and
form posts also point to the correct pages and urls. Remember
that the internet is case sensitive, so be careful with upper and
lower case letters. Also, never use spaces in file names or page
names.
Uploading The Template
HTML Code and Images
The next step will be to
install the template code in your website.From the management
console
> Click on Page Properies
> Click on Build Custom Templates Edit / Upload Template
There will be 4 links on the
page. To upload the html, upload images, upload the thumbnail and
to view the template. Start with the image upload.You can upload
10 images at one time and up to 100 images total with a combined
max size limit of 1MB.
The images must be named
without spaces, alpha numeric characters only and names must be
25 characters or less not including the file extension. This is
the same as any other image upload, except it will not modify the
images size or file names keeping your work intact and unaltered.
After uploading the images you
will need to upload the HTML. This step is not an upload but a
simple copy and paste of the source code into a form. This allows
you to edit the template in real time on the website for the
final tweaks.
The "View Template"
lin2 will allow you to view the actual template as it appears on
the website. If all of the work you have done is correct it will
all be as you expect it. You can view the actual page and see if
any of the images are missing, or the code needs to be adjusted.
Once you have completed your
final adjustments you should take a screen cap of the template,
resize it to approxaately 200 pixels wide and 150 high, although
there are no size limits. If you don't know how to do this, you
can use a generic image (click here for a blank image).
Now upload the thumbnail using
the upload Thumbnail link. This will add your custom template to
the choices in the main template gallery and allow the site owner
to change to the custom design.
Your Finished with the
Basics
That is all there is to it.
You have installed a completely custom design. Unfortunately, we
only replaced the main content area, so the site owner does not
have the ability to alter buttons, modify backgrounds or the main
title space.
If you want to build a
completely dynamic template continue to Building
Dynamic Templates.
|