|
How
to use the HTML Editor
WYSIWYG - What You See Is What You Get
This WYSIWYG
editor makes it very easy to write html using
visual aids and easy drop and drag functions to
build the page automatically generating the HTML
output.
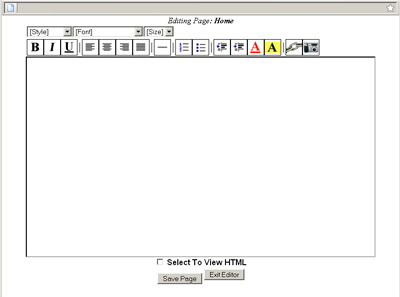
Below is how
the editor appears when you first open it:

Simply type
any text into the white area of the editor. This
editor is modeled after the standard windows type
word processor. You may already be familiar with
the editor functions if you have ever used any
word processing program.
HTML does
not allow for the same image and word placement
as Microsoft Word or Wordperfect. The limits of
the online browsers make it hard to get the same
look as you would with a standard windows editor.You
can only justify left right and center on each
line. But that should be enough, if you are
creative.
Highlight text
and change the font size, color, justification or
add links. You can also link images and adjust
image size using the editor.
When you are
finished, simply click the "Save
Page" button at the bottom and the
page will be saved. You can view the new page by
clicking the VIEW link in the main management
page. Remember to reload/refresh the page to see
changes.
Cliking the
"Exit Editor" button will close the
editor with out saving any changes.
Selecting The
View HTML box will show you the actual HTML code
of the page you are building. You can edit the
HTML if you know how.
Read the next
few pages for details on changing fonts, adding
links and images.
Changing Text:
Spacing, Style, Font, & Size >>
|

